
Setting up an email server in PaperCut NG & MF opens the door to several handy features like low toner alerts, error notifications, Scan to Email, Email to Print, and more.
In the past, connecting PaperCut to a Gmail account was as simple as entering a username and password. But those days are gone—many cloud providers, including Google and Microsoft, have phased out username and password authentication in favor of more secure methods. We’ve explained these changes in detail here: Email Basic Authentication Changes .
To connect Gmail now, you’ll need to set up OAuth 2.0 authentication. This means creating a project in Google Cloud Console, enabling the Gmail API, and entering secure credentials into PaperCut.
This guide walks you through the steps to connect PaperCut to Gmail over OAuth2, which includes:
- Start a new project in the Google Cloud Console and enable the Gmail API.
- Set up the OAuth consent screen so Google knows who’s requesting access.
- Create OAuth credentials so PaperCut can talk to the Gmail API.
- Enter those credentials into the PaperCut admin interface and authorize.
Before you begin, make sure you have:
- A Google Workspace or Gmail account you want to send mail from.
- Access to the Google Cloud Console with permission to create a project and manage OAuth consent settings.
1. Start a Google Cloud project and enable the Gmail API
To get PaperCut talking to Gmail, you’ll first need to enable the Gmail API in Google Cloud Console. Gmail is one of the free, public APIs that anyone can use without being a subscriber of Google Workspace.
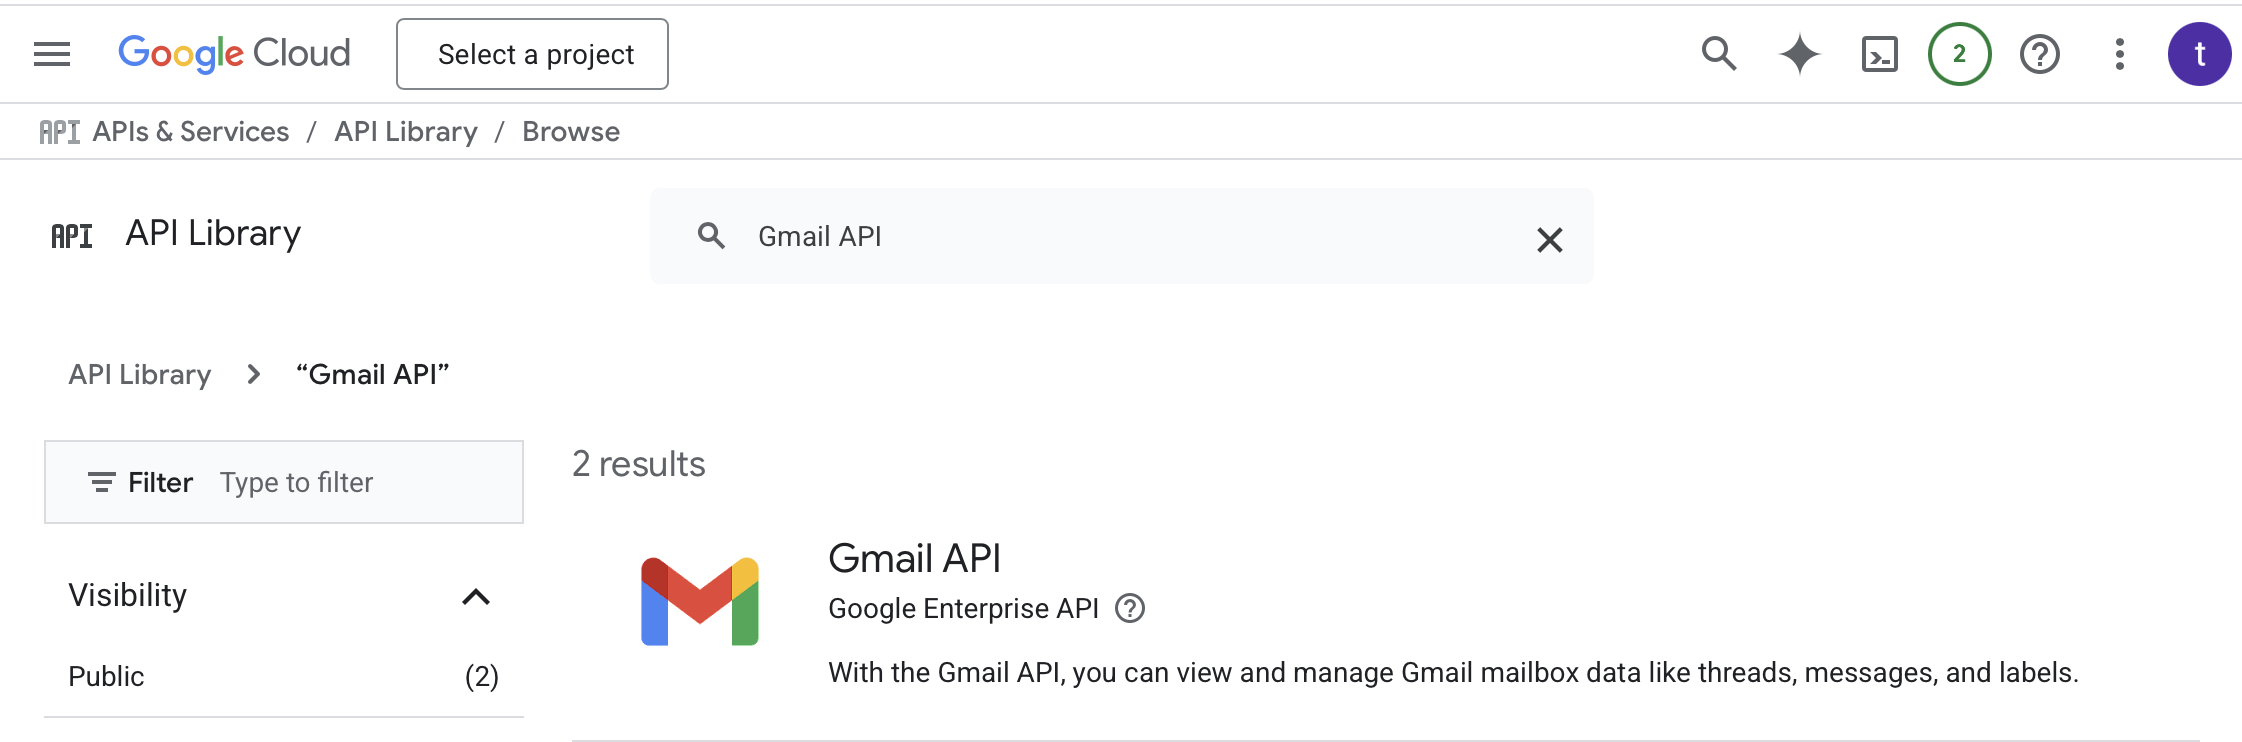
- Head to the Google API Library .
- Scroll or search for Gmail API and click Enable.
- If this is your first time here, Google may automatically create a project for you called My First Project. (To create your own project, open the project name to open the project picker and select New Project.)
2. Set up the OAuth consent screen
You need to start by configuring the OAuth consent screen.
- On the left menu, choose APIs & Services then click OAuth consent screen to open the OAuth Overview page.
- Click Get Started.
- Enter an app name (ex: “PaperCut Gmail SMTP Project”) and user support email. Neither will be shown to your users, nor seen by the admin beyond the initial setup. Click Next.
- Choose the Audience depending on your Gmail account type and click Next.
- Free-tier Gmail - choose External, since this will be the only option.
- Google Workspace - choose Internal, since this app will likely be authorized by a service email account within your Google Workspace tenant. Select that option and click Next.
- Under Contact Information specify an email for Google to reach you at regarding changes to your project.
- Agree to the Google API Services: User Data Policy and click Continue.
- Go to Data Access.
- Click Add or remove scopes.
- Next to the filter search for “ https://mail.google.com/ ”.
- Check the box for Gmail API then click Update.
- Now scroll down and you should see the new scope added to Your restricted scopes. Click Save.
- Go to Audience.
- Leave the Publishing status as Testing.
- Under Test user click + Add users. Add the email address you intend to use for email notifications or the Email to Print service in PaperCut MF/NG and Save.
3. Configure the OAuth2 client
- Click Clients.
- Click + Create client at the top of the page.
- Under Application type choose Web application.
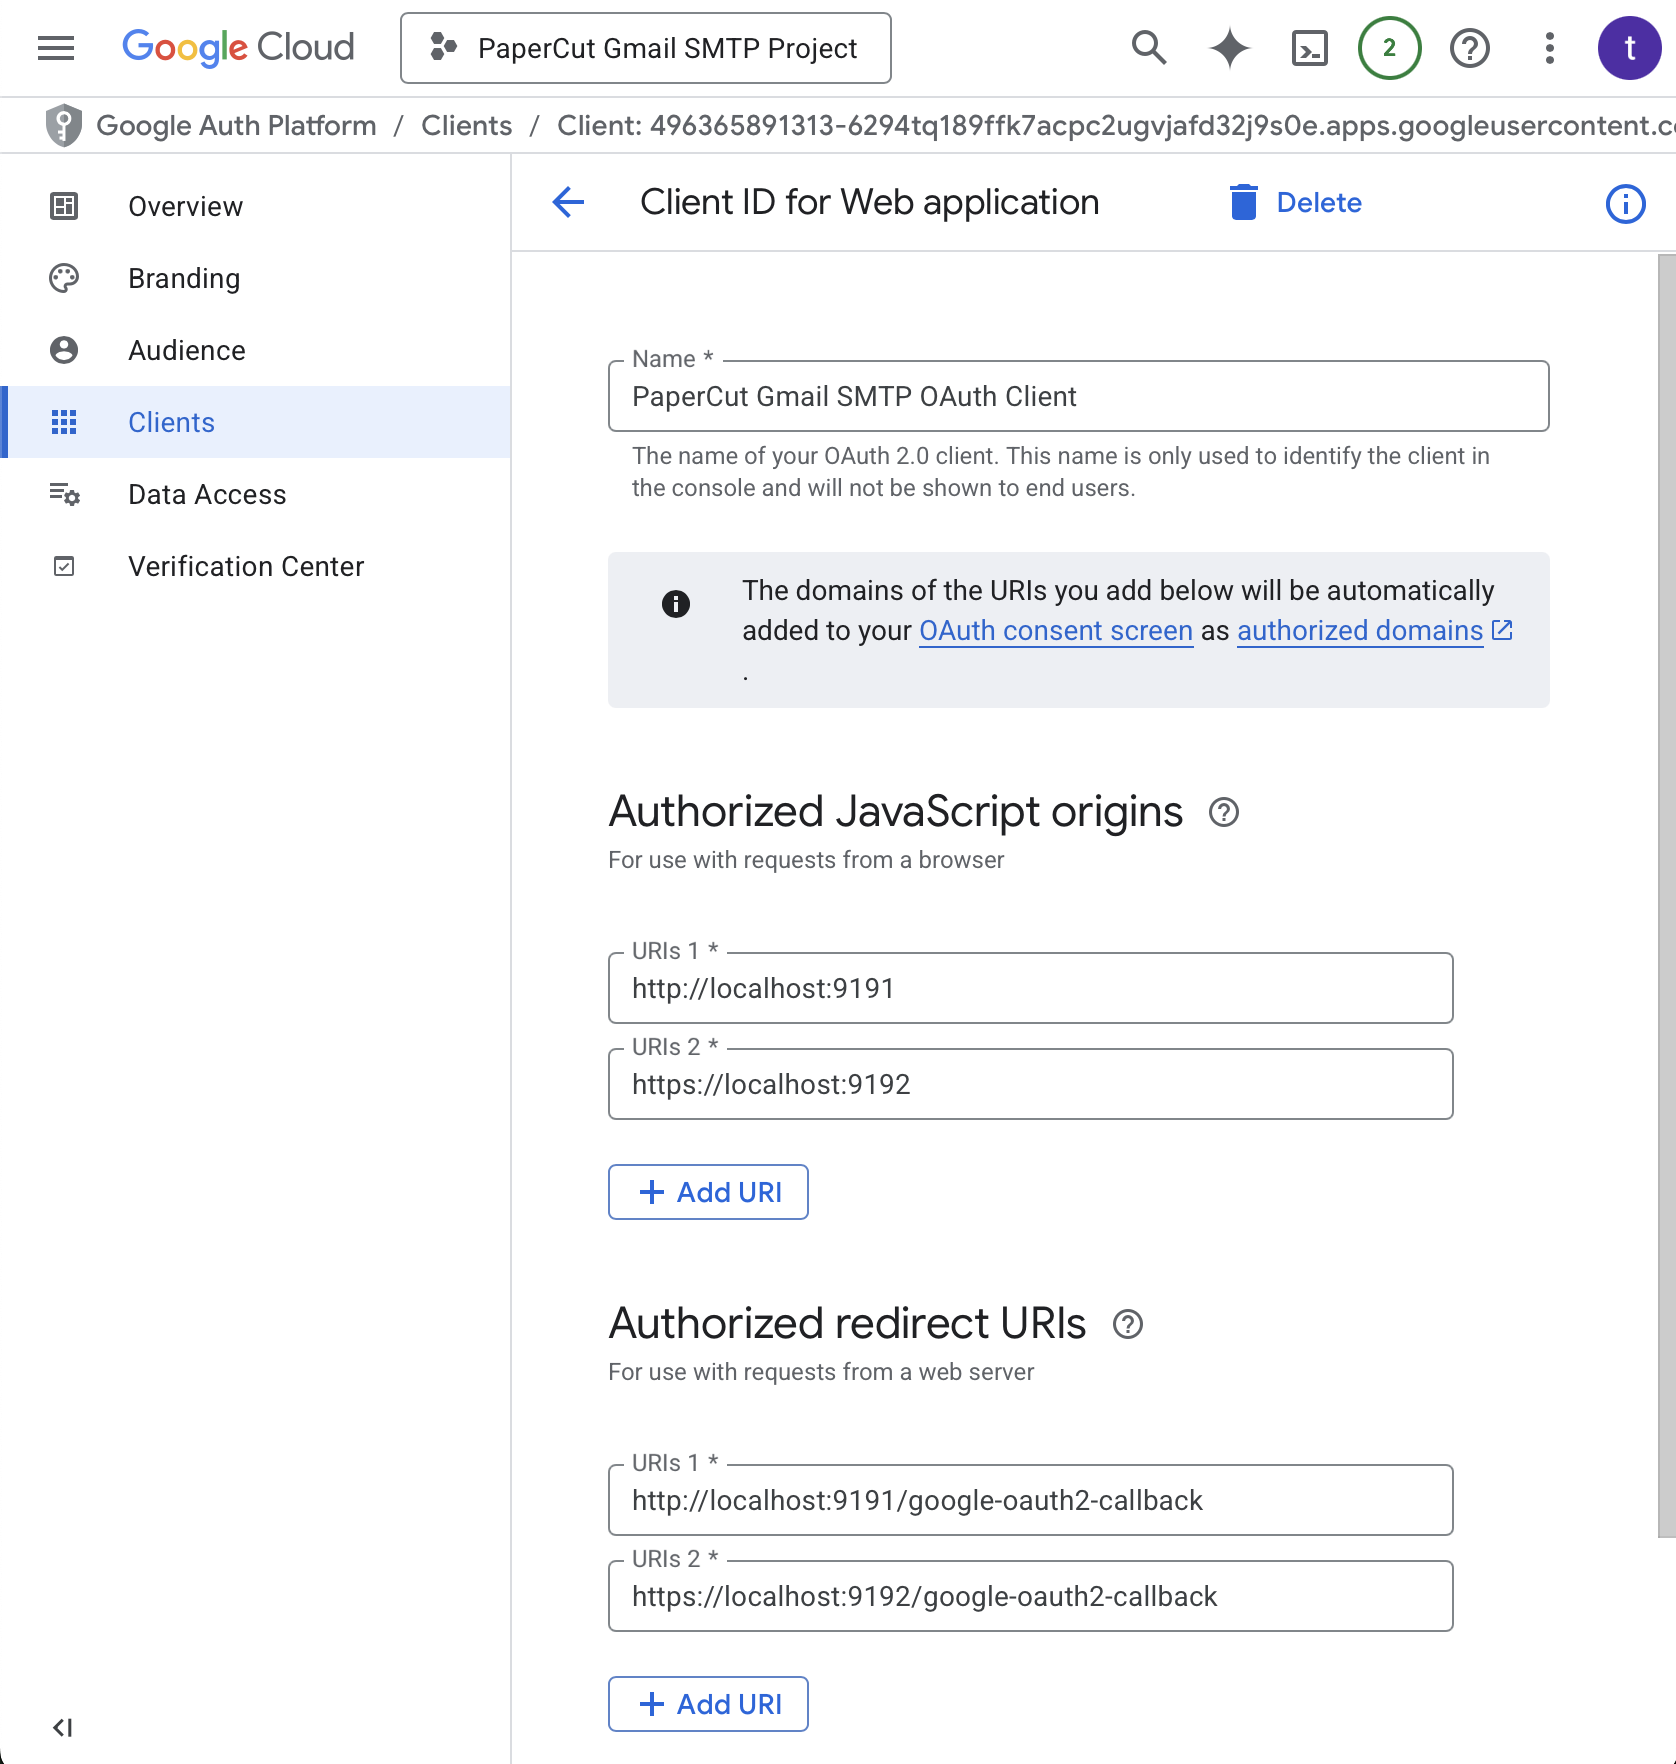
- Give this client a name. (ex: PaperCut Gmail SMTP OAuth Client)
- Under Authorised JavaScript origins click + Add URI and enter:
http://localhost:9191https://localhost:9192
- Under Authorised redirect URIs click + Add URI and enter:
http://localhost:9191/google-oauth2-callbackhttps://localhost:9192/google-oauth2-callback
- Click Create (or Save if you are editing the details of this client).
- Click Download JSON to save the client ID and client secret. Store this information somewhere secure.
Whew! You’ve completed all the setup steps required on the Google side! Now let’s switch back to PaperCut.
4. Configure SMTP Server Options
-
Log back into the PaperCut NG/MF server as an administrator.
-
Navigate to Options and then the Notifications tab.
-
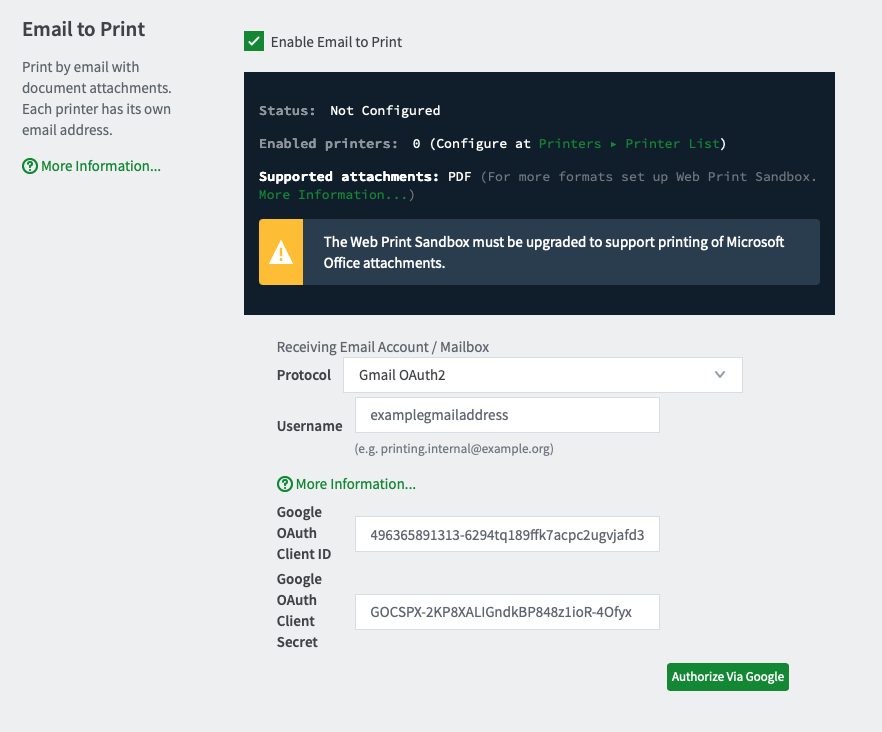
In SMTP Server Options under the SMTP server dropdown select Gmail with OAuth.
-
Fill out the required fields…
- Username
- Google OAuth Client ID
- Google OAuth Client Secret
-
Scroll down and click Apply.
-
Click the new Authorize button that appears under the SMTP Server Options.
-
A new browser tab will open to Google’s sign-in screen. You may be prompted to Sign in or Choose an account. Either way, log in with the same Username entered previously under SMTP Server Options.
-
Follow the prompts and click Continue to grant consent to the PaperCut app to have access to the mailbox.
-
When completed you will be returned to the PaperCut admin interface and the status window should update to Status: OK.
-
Lastly, scroll down to the bottom of the Notifications window and attempt to send a test notification using email to confirm successful delivery.
Error: “Client details cannot be saved…”
When using Gmail with OAuth 2.0 in PaperCut, both Email to Print and SMTP notifications must use the same Google Cloud OAuth client—that means the same client ID and secret.
You can use two different Gmail addresses (like print@yourdomain.edu and notifications@yourdomain.edu), but they must:
- Be added to the same client’s test users list
- Share the same OAuth credentials
- Use the full Gmail scope: https://mail.google.com
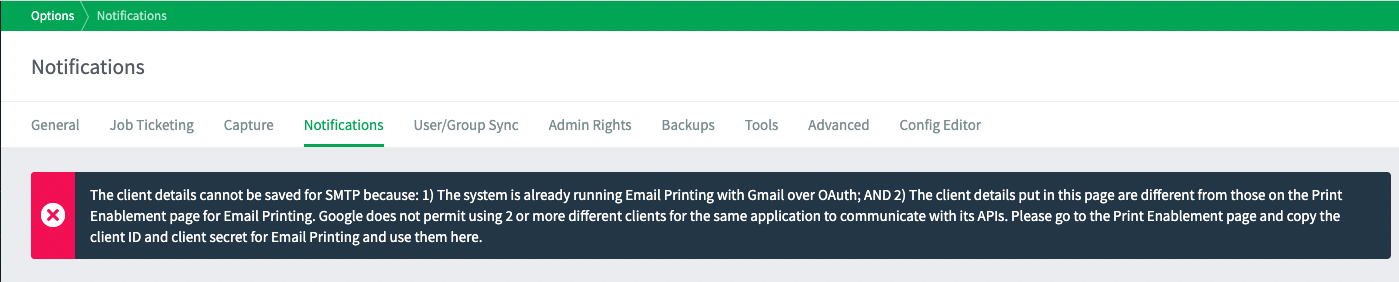
If you try to save different client details while one service is already set up and working, PaperCut will block the change and show an error like this:
From the Notifications tab (SMTP):
From the Mobile & BYOD tab (Email to Print):

These checks are designed to prevent misconfiguration and keep Gmail working smoothly. In most cases, you won’t see any errors from Google itself—PaperCut stops the problem before it reaches that point.
Error: “OAuth2 asked for more”
Occasionally with shared Gmail accounts, (while negotiating with Google’s authentication services) the user may run into an error that says “Reason: OAUTH2 asked for more”, while seeing the SMTP client failing to send a notification after what should have been a successful authentication process.
Generally there are 2 reasons why this might happen. One of them does not apply to us—where a full scope must be requested even if we only do either IMAP or SMTP with a JavaMail client, as MF will always request the full scope https://mail.google.com .
The other reason why this happens could be related to how the account is being used. If it’s an organizational account that is shared between a few users who log in now and then from different OSs, different browsers, and different IP addresses, there is a greater chance that the authentication process will be pulled up by Google to do a random spot check to confirm that the user is who they say they are. This could be in the form of entering a verification code coming through a text message or clicking on a “YES” button on a smartphone’s Google or YouTube apps.
Normally, this shouldn’t happen to a set-and-forget, dedicated SMTP account used by an organization. In the rare case that it does happen, you may need to set up the client information and then authorize again. To do this, you may have to change the SMTP type to “choose…” or “custom”, save, and choose “Gmail over OAuth” again, and enter the client details again.
This is because when the SMTP manager is in an error state, we disable the Authorize button. Most of the time, the SMTP manager is only in an error state because the details of the client are wrong. We encourage you to check and change them before attempting to authorize through Google again.
When the SMTP manager runs into an error state because it gets asked “for more”, it doesn’t mean the client details are wrong. For this problem that should normally not happen, you will need to use the workaround method mentioned above.
To avoid this, please don’t use a shared account for SMTP purposes. If you know different people from your organization who use a certain email address from different IPs, different OSs, and different browsers for other business purposes, do not use this email account as your SMTP service account.
Experiencing an HTTP ERROR 500 with Gmail OAuth2?
Having trouble with Gmail OAuth2 and seeing an HTTP ERROR 500 after clicking Authorize via Google? Don’t worry, we’ve got you covered!
Many users have found success with these simple steps:
- Open PaperCut MF and clear any existing username and credentials from the Email to Print settings.
- Disable Email to Print and then click Apply.
- Restart your PaperCut Application Services. You can find instructions here .
- Clear your browser’s cache on the server where PaperCut is installed.
- Launch the PaperCut Admin Interface in a private or incognito session.
- Now, try configuring Email to Print again! Follow our guide here for a smooth setup.
We hope this helps you get back on track!
What’s next?
Head back to the Configure Email page to finish configuring System Email Notifications.
Comments